

On July 31st 2021, Microsoft retired Skype for Business. However, if you were using the application before and you have not uninstalled it, you might have noticed that by default will pop up automatically when Windows starts.
In this guide we will look at how to disable Skype for Business and how to uninstall it.
Disabling is the fastest method compared to uninstalling the software.
If you are using a company laptop, most of the time, you will need to contact the tech team because they might restrict your access.
To prevent Skype for Business from starting up follow the instructions below
Disable Skype for Business via Skype Settings:
- Click the gear icon to open the Options box
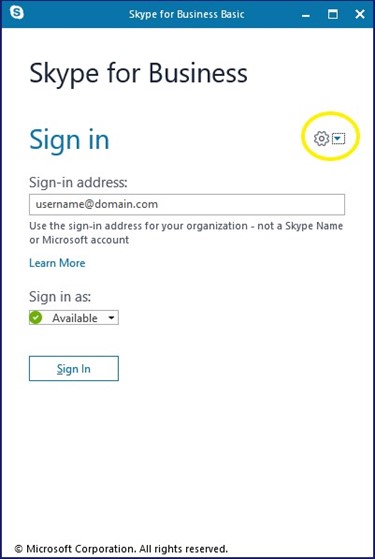
- Alternatively, click the downward arrow and then Tools > Options
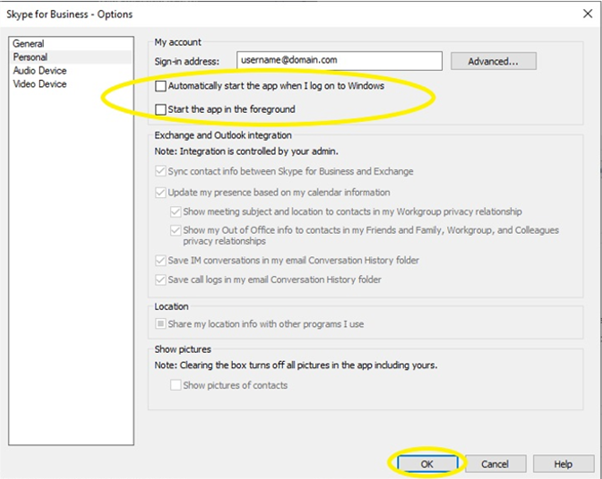
- Select Personal on the left side and uncheck:
☐Automatically start the app when I log on to Windows
☐Start the app in the foreground
Click the OK button to confirm the changes.
The above method will ensure that Skype for Business will not load with the other applications when you restart the laptop.
Uninstall Skype for Business
- Open the Start menu
- Type Control Panel
- Select Programs and Features
- Search Skype for Business right click and select Uninstall
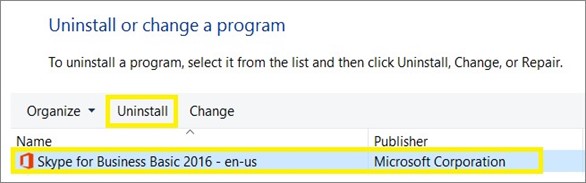
5. Restart the laptop
If you do not see Skype for Business, you are using a version that’s integrated with other Microsoft 365 Applications. The only way to uninstall it, is to remove and re-install Office 365.
If you have any other suggestions or questions, please don’t hesitate to leave them in the comment section below and we will check them out.
Make sure to follow us on Facebook and Twitter and to Subscribe for more tech updates.


